
Back in the shop, despite the clouds! Nothing too exciting, just background removal from around the inverted lunettes. Background removal is tricky at best, especially with flat sawn stock. I use a VERY sharp 10 mm #5 straight gouge to pare along the grain from feature to feature. I remove the background to the depth of the V-tool cuts. I usually pick a midpoint in between and pare in both directions using both mallet and hand pressure, depending on the distance. The lower the angle on the gouge, while paring, the better the results.

I find it helpful to restrike the features, from time to time, to create a vertical wall which helps alleviate the chance of undercutting.

Once the entire background is removed to satisfaction, I rub my hand across the work feeling for any snags. If felt, I will rub the work lightly with low grit sandpaper to remove them.

Next comes the stippling. I use a short bolt, filed to pyramidal points. Holding the bolt tight against the vertical walls, I tap, relocate, tap, relocate, and tap again until the feature is outlined. I then go back and stipple the remainder of the background.
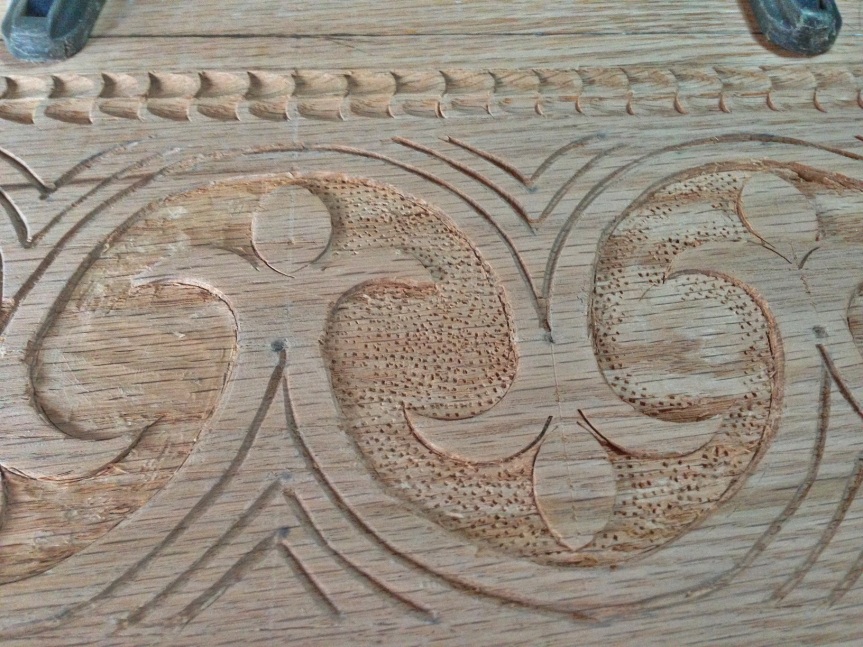
At this point, the carving is essentially complete. I, however, like to add interesting visual points with punches and extra gouge strikes.

So … there you have it! The front of my next box, carved with inverted lunettes. Now, I just have to repeat all of this on the sides!


Thanks for the detailed explanation, Ron.
I’ve got my miter-jack saw almost together. The front knob goes on today, and then it’s time for finishing. I modeled it after your tenoning saw.
Plus a batch of wood has been soaking in dyed cactus juice since yesterday morning, so that gets to cook up in the toaster oven. Busy shop day ahead!
LikeLiked by 1 person
My pleasure, Dave! Can’t wait to see those projects. Keep me posted!
LikeLike
I found the S-braid description particularly helpful Ron, thanks for that. I haven’t made something in this style since this time last year (http://www.stochasticgeometry.ie/2018/01/25/done-4/) and even then I stayed with very simple decorative elements like running chains. I’ve been meaning to get back to doing more of this after I finish the current task; so your blog posts are of great interest!
LikeLiked by 1 person
Thank you, Mark! Glad to help. Nice work on the running cable.
LikeLiked by 1 person